Paying the NBI Clearance fee using GCash is one of the easiest and fastest ways to finish your NBI online application. As digital payments become more popular in the Philippines. GCash is now a trusted and widely used mobile wallet for government payments including NBI Clearance fees.
Why Use GCash for NBI Clearance Payment?
Using GCash for NBI payment offers many advantages compared to over-the-counter payments.
Benefits of Paying NBI Clearance Fee Using GCash
-
No need to visit payment centers.
-
Payment anytime (24/7).
-
Fast and instant confirmation.
-
Secure transaction.
-
Easy to use mobile app.
-
Saves time and effort.
Requirements Before Paying NBI Clearance Fee Using GCash
Before you proceed with the payment, make sure you have the following:
-
Completed NBI Online Application.
-
Reference Number generated by the NBI system.
-
Active GCash account.
-
Sufficient GCash balance.
-
Stable internet connection.
Step-by-Step Guide: How to Pay NBI Clearance Fee Using GCash
Step 1: Go to the NBI Clearance Online Website
Visit the official NBI Clearance Online portal and log in to your account.
-
New users must register first
-
Existing users can log in using email and password
Step 2: Complete the Online Application Form
Fill in all required personal details such as:
-
Full name
-
Date of birth
-
Place of birth
-
Address
-
Contact details
-
Valid ID information
Make sure all information is correct and matches your ID.
Step 3: Set Your NBI Appointment Schedule
Choose:
-
NBI branch
-
Appointment date
-
Appointment time
After scheduling, the system will move you to the payment page.
Step 4: Select GCash as Payment Method
On the payment options page:
-
Choose GCash
-
Review the total payable amount
-
Click Proceed to Payment
The system will generate a reference number. Save it carefully.
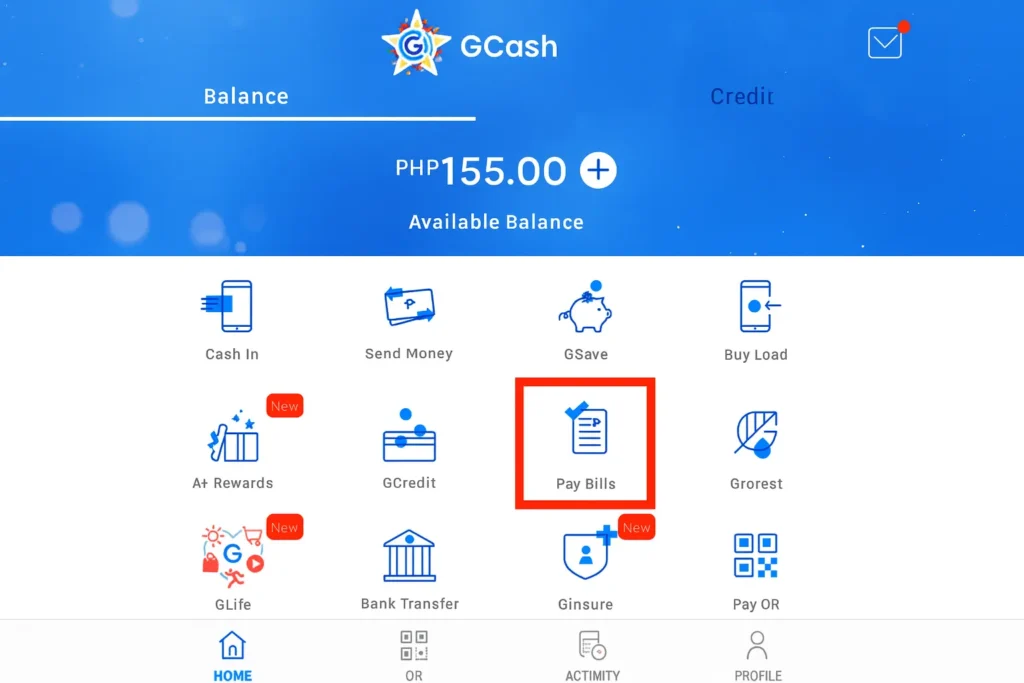
4. Pay Using Bills Payment
-
On the GCash home screen, tap “Bills”.
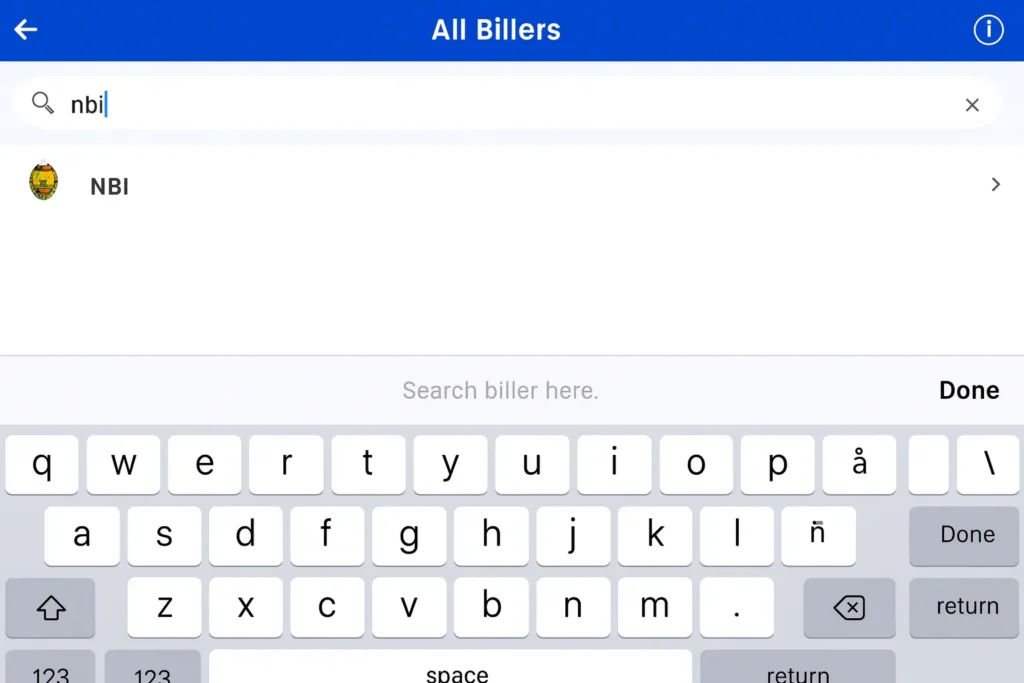
5: Choose a Government
- Select “Government” from the list.
You can also read How to Pay Your NBI Clearance Application Fee at 7-Eleven.
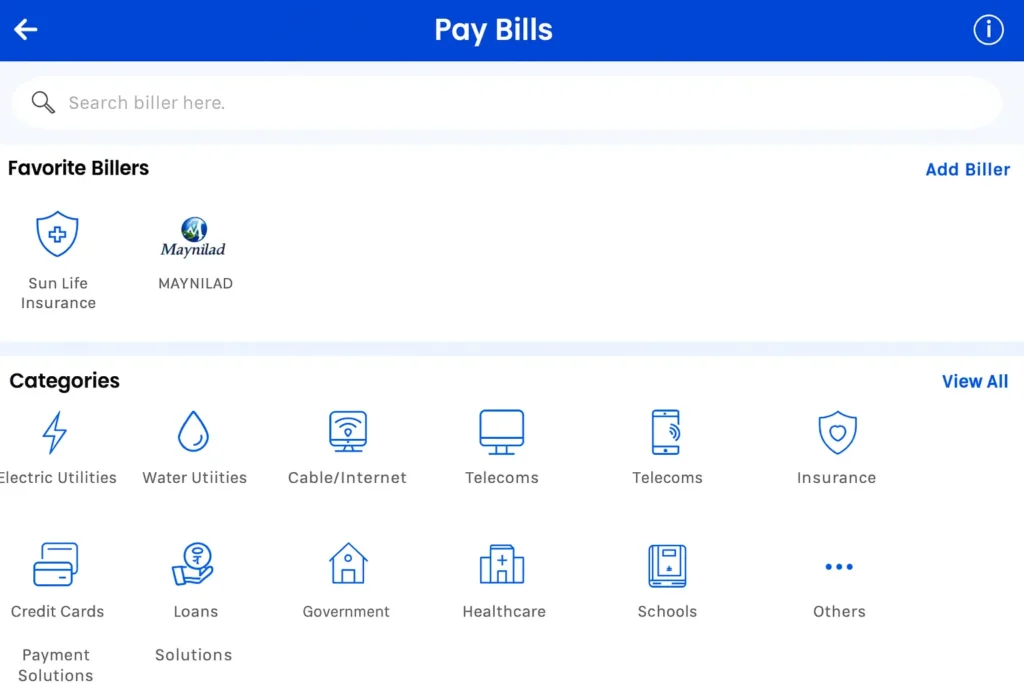
6. Pick NBI (via DragonPay).
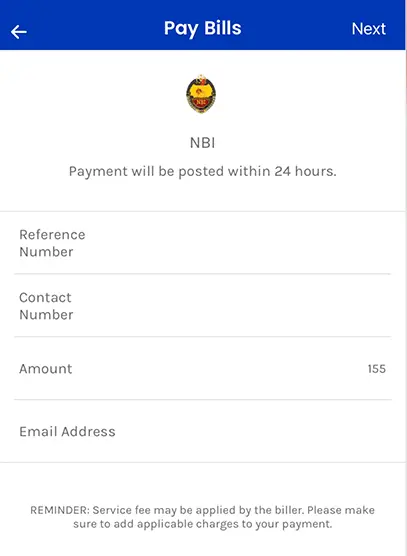
Enter these details:
- Reference Number: from the NBI Appointment website.
- Amount: shown on your application form.
- Contact Number: so you get payment confirmation.
7. Confirm Your Payment
-
Check all details again.
-
Tap “Confirm” to pay.
-
You will get a message on GCash and also an SMS to confirm payment.
8. Check if Payment is Successful
-
Log in again on the NBI Clearance website.
-
Go to the Transactions tab.
-
If it says “Paid”, then your payment went through successfully.
How to Check If NBI Payment Is Successful
To verify your payment:
-
Log in to your NBI account.
-
Go to Transactions.
-
Check payment status.
If paid successfully, it will show PAID.
Fill details
What does this mean? It only displays that your payment was successful and you can now continue to the next steps of the NBI Clearance application. If you are uncertain about what to do next just wait for your scheduled appointment date and time. Make sure to bring all the requirements containing two valid IDs and your NBI Clearance Reference Number.
Frequently Asked Questions:
How do I pay my NBI Clearance fee through GCash?
Open the GCash app go to Pay Bills choose Government then select NBI Enter your Reference Number and amount then click Pay.
Are there any additional charges for payment through GCash?
No, there are no further charges when paying through GCash. You only pay the NBI Clearance fee.
What if my GCash balance is insufficient?
You can add money to your GCash account through online banking or partner exits.
Will I receive a receipt?
Yes, after payment you will receive a confirmation and a digital receipt which you can view in the Operation History.
What should I do if the payment fails?
Check your dealing history. If the amount was disregarded contact GCash support or the NBI for support.
